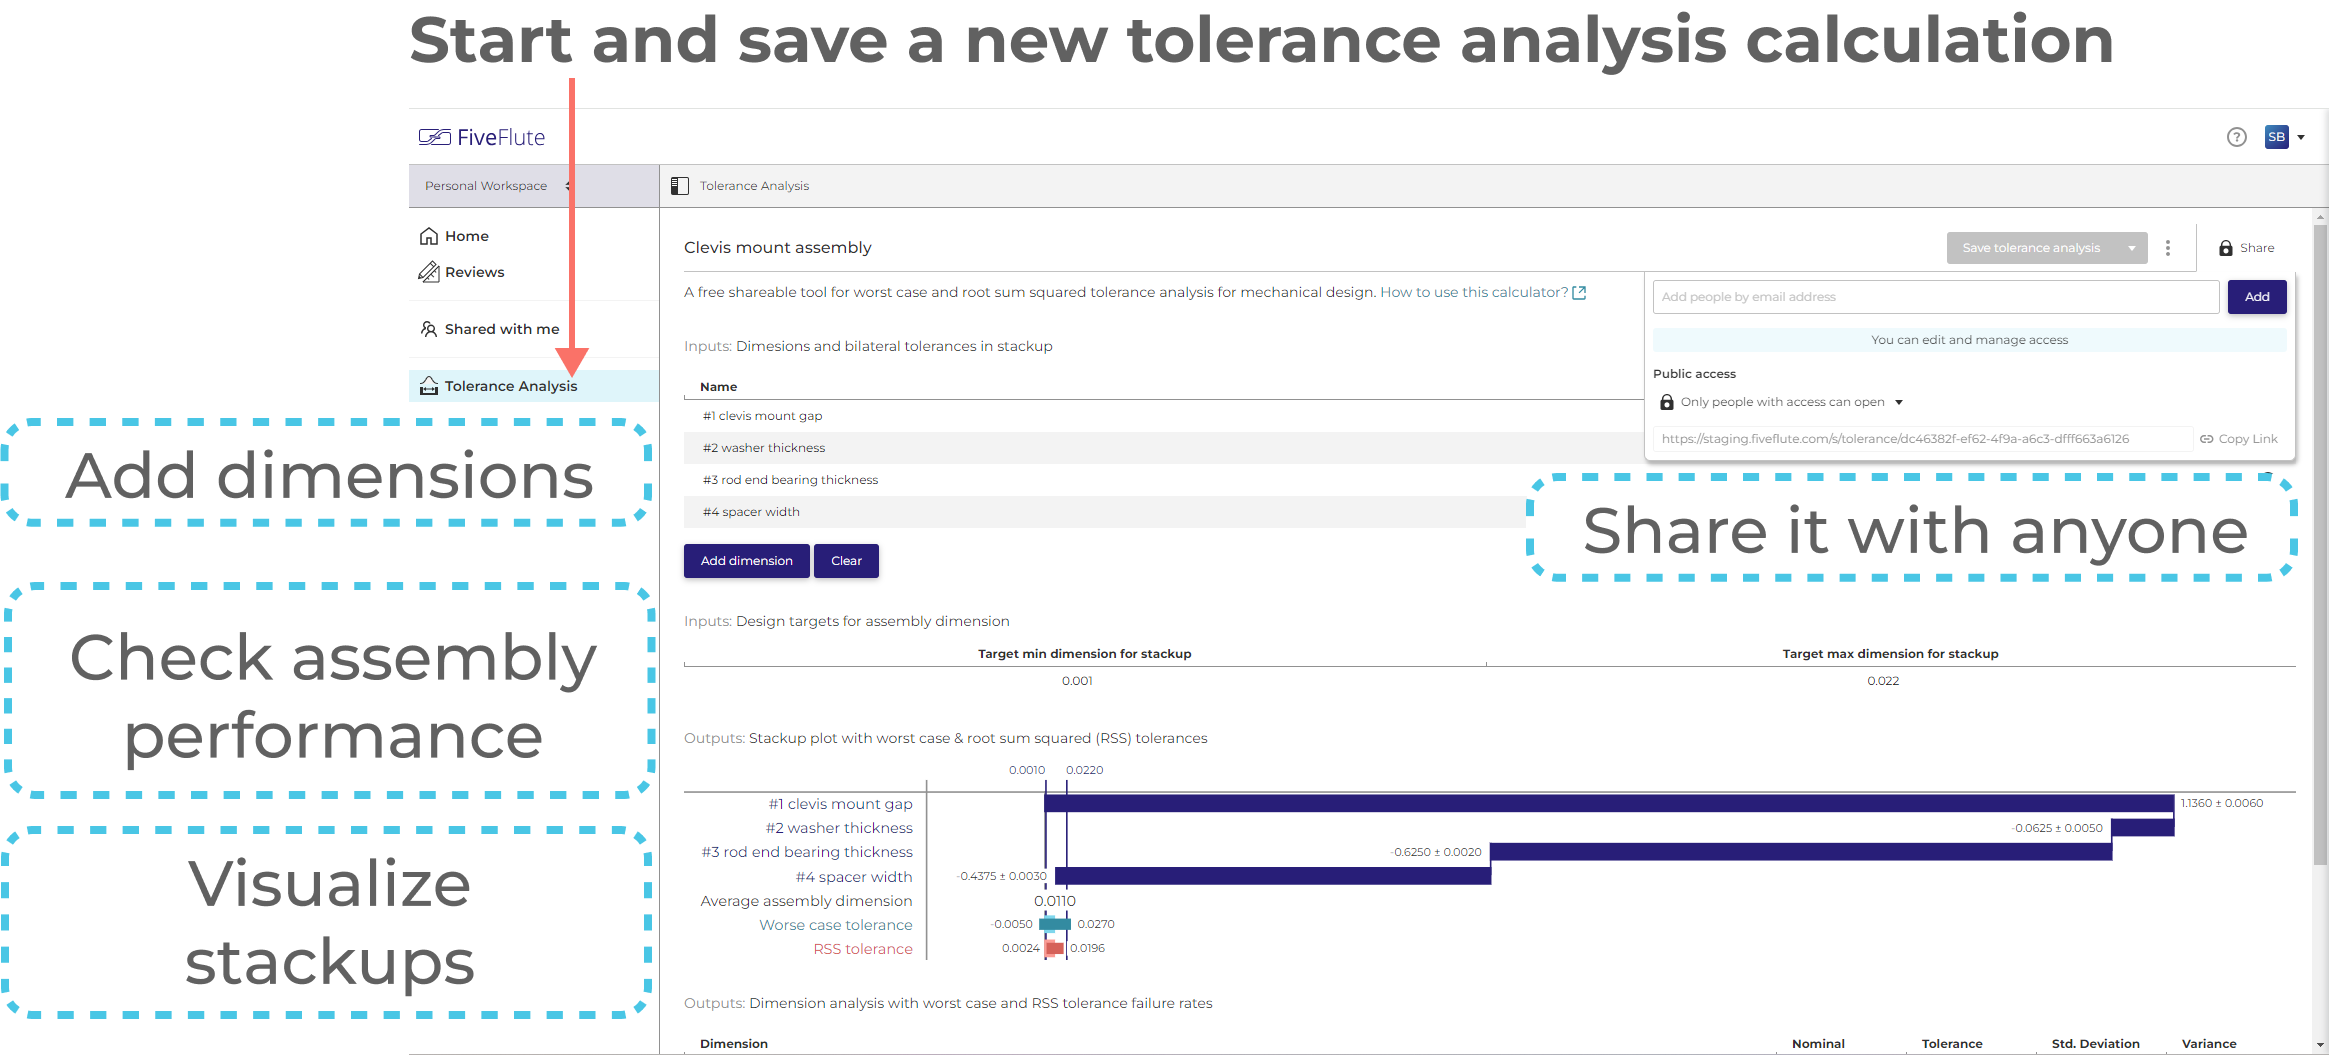
Here at Five Flute we help engineering teams design great products through better communication. But we know that communication is just one of many problems engineers face when designing, building, and testing next generation products. To that end, I’m excited to introduce you to our free tolerance analysis calculator! It’s built for solving worst case and RSS assembly tolerance stackups. You can use it to iterate on dimensional tolerances during design, estimate manufacturer performance, and recover from manufacturing mistakes. Best of all it’s a free tool that gives you visual results that you can save and share with anyone.
🔎 You can find it here: Tolerance Analysis Calculator
💡Pro tip: Creating a Five Flute account lets you save your analysis!
How to use the Five Flute tolerance analysis calculator
First, it helps to know a bit about how RSS tolerance analysis works. We’ve written two helpful guides to bring you up to speed in case you need a refresher.
Intro Guide - good for understanding the basics.
Advanced Guide - good for calculating failure rates and dealing with trickier tolerance problems.
We’ll step through how to use the tolerance analysis calculator using a simple mechanical assembly example.
Example walk through
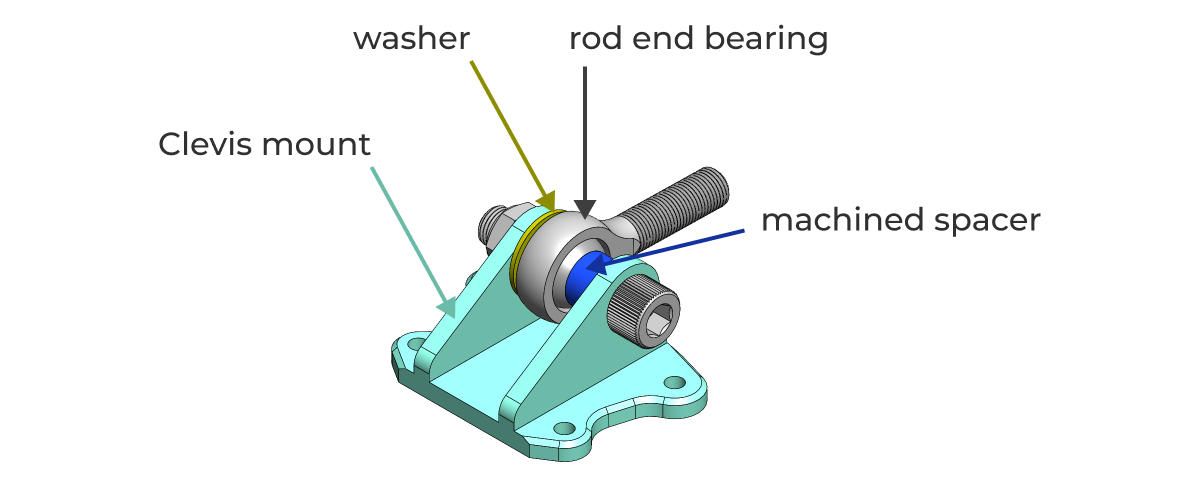
In this example there is a clevis mount that secures one end of an actuator by bolting to a rod end bearing. The assembly consists of the clevis mount, a rod end bearing, a machined spacer, and a flat washer.
Build your tolerance stackup
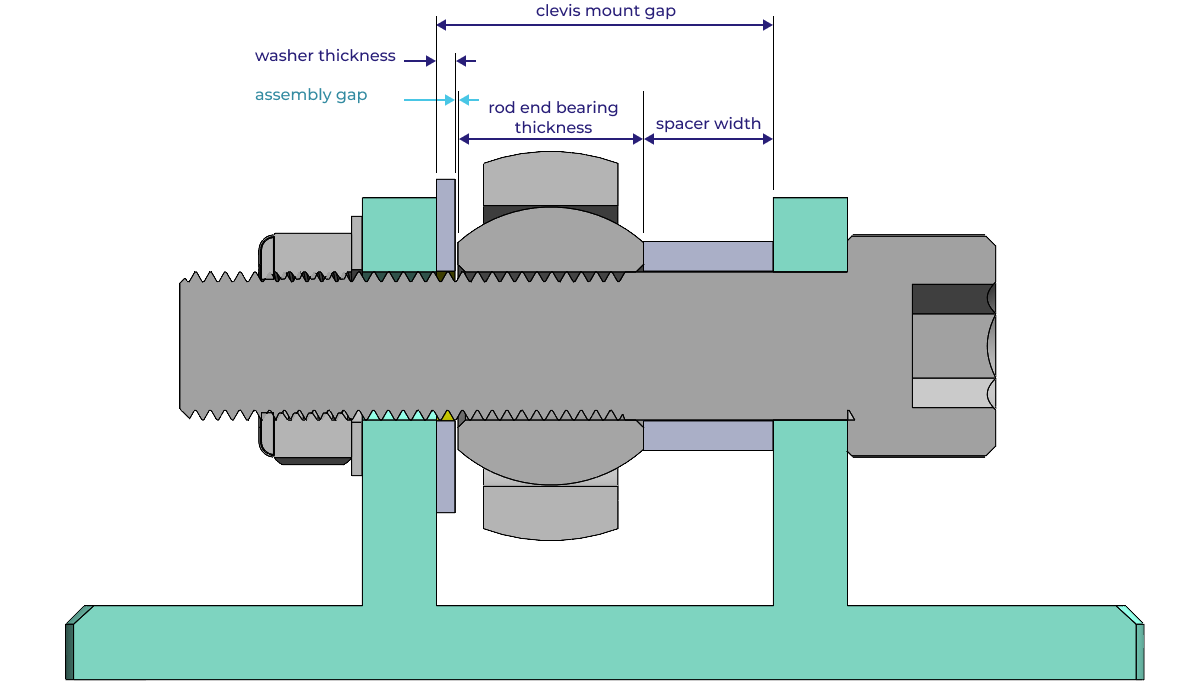
In order for this assembly to work there must be a large enough gap for the washer to be inserted easily when sliding the bolt through the clevis. This gap, shown below as assembly gap, cannot be too large or else the bolt will not maintain enough preload on the spherical bearing and the clevis will be too deformed when this bolt is tightened. The critical dimensions in the tolerance stackup and tolerance stack equation are shown below.

Enter dimensions and tolerances
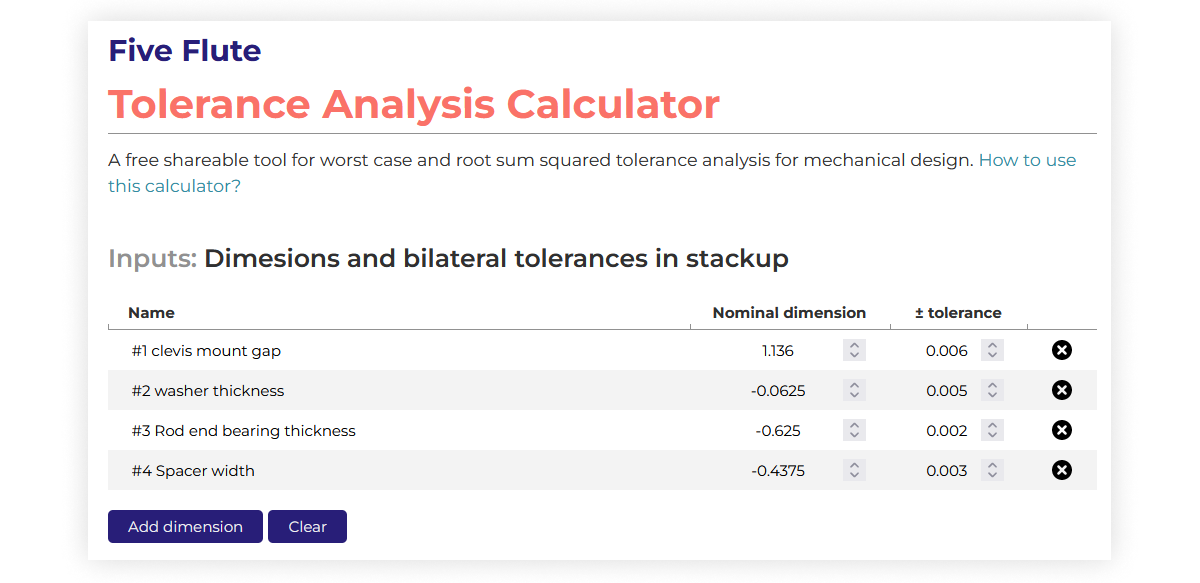
Now simply enter the dimensions and tolerances in the input table of the Five Flute tolerance analysis calculator according to your tolerance stack equation. Make sure you give each dimension a name so the results are clear. Note the negative dimensions in this table! The calculator will sum these dimensions to compute the assembly dimension, thus a subtracted dimension in a tolerance loop should be entered as a negative value.
Enter assembly dimension limits
Next, you should enter the upper and lower limits for your computed assembly dimension. In our example we know that the assembly gap must be greater than zero, lets say 0.001” so assembly is easy, and no more than 0.022” so as not to damage the clevis while preserving functionality. Enter these limits in the design targets for assembly dimension section.

Note: you would have to figure these limits out on your own for each assembly you analyze, but that’s where the fun is in engineering.
View and interpreting results
Now that you’ve entered your individual and assembly dimension values, you are ready to view your results. First check out the Outputs: Stackup plot with worst case & root sum squared (RSS) tolerances section. The calculator automatically builds a plot of each individual dimension and how they sum in the tolerance stack. This section shows a graphical representation of the individual dimensions and how they sum according to the stack equation.

The assembly level results include graphical representations of the assembly dimension and tolerances for each analysis type.
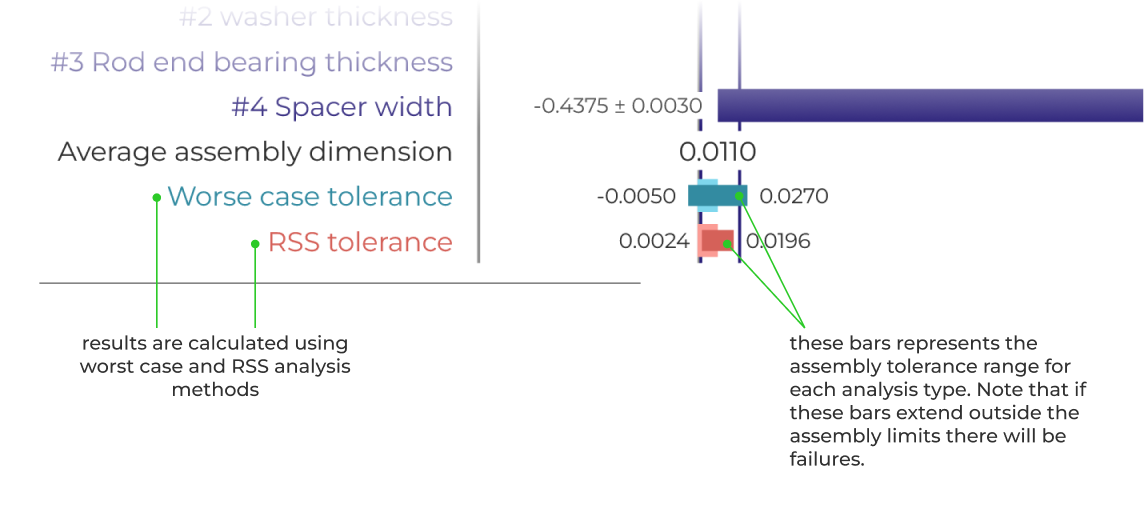
Next check out the Outputs: Dimension analysis with worst case and RSS tolerance failure rates section. This section shows all of the results in a tabular form, including left and right tail failure rates for the assembly limits you entered.

Save and share your results
You can give each analysis a name and save it in your personal workspace with a free Five Flute account. When it's time to loop in your team, you can share it by email or via a publicly accessible URL.
